
It’s one of the oldest drinks in the world. People have brewed it for millennia for a variety of reasons ranging from religious and solemn (as in sacred offerings or rituals), to the less noble but much more fun (as in going to the pub with friends – remember that?!)
Beer, or more accurately craft beer, is something that certain types of people take very seriously. You know the type, don’t pretend. Friends of mine who know about this stuff talk passionately about ‘hoppiness’ and ‘fermenting yeast’ while I nod along, desperately and hopelessly lost, wondering when’s the best time to mention that I can’t stand any of it – be it ale or lager, craft or commercial.
I’m sorry, it just tastes like soapy water to me. Perhaps I’ve never tried a good one, I hear you cry. My husband is quite into his hipster craft stuff, though, and even these brews – with their funky label designs and heritage signposting – still taste disgusting to me.
The thing is, though, I’ve been writing this blog for almost a year now. Stews and soups and pies and cakes are all well and good, but as time’s gone on, especially as I’ve looked at more ancient stuff, I can’t help but feel I’ve neglected a huge part of food history by ignoring beer. It was such an essential part of everyday life for our ancestors that I felt obligated to give it a go. And so I embarked on what was possibly the most half hearted, begrudging beer brewing process the world has ever seen.
A note on guesswork and adaptation
I’m dealing with ancient Egyptian beer here, for which there are no surviving recipes. Or if there are, they’re in hieroglyphs which is all, er, Greek to me. Equally, as I found beer brewing to be a totally alien concept, I chose to copy the process that Tasha Marks, Michaela Charles and Susan Boyle (no, not that one) set out when they recreated a version of ancient beer for the British Museum, rather than interpret it for myself.
These women talk a lot more about the science and history behind beer making (and their results are better too), so please do go and check out their post. I mean it; they have a video and everything. Andrew Coletti at Pass the Flamingo has also looked at ancient beer in brilliant depth with some great results, and I used his excellent blog post to guide me on the more practical aspects of this experiment.
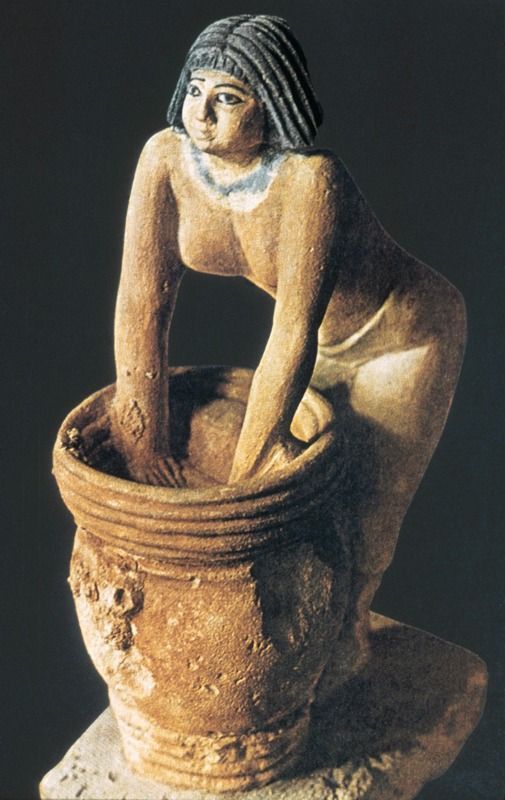
The ancient Egyptians loved beer. Couldn’t get enough of the stuff. They had loads of names for it depending on how it was used, or who it was for, or who had made it. In fact, such was the Egyptian preoccupation with beer that they’re often praised as being among the first – if not the first – civilisation to really nail the brewing process. They can’t quite claim to be the inventors of beer, though – that accolade goes to the Sumerians.
Sumerian beer appears to have been a concoction so thick that it had to be drunk through a straw (another Sumerian invention), and was perhaps diplomatically described as an acquired taste “to certain palates” by the Greek writer Xenophon. The Egyptians refined the Sumerian method over time – still favouring the straw, but gradually moving away from a porridge like drink to a smoother, runnier liquid. That’s not to say it was thin or weak, though.
Beer: humanity’s salvation?
In fact, Egyptians relied on beer not being weak. According to one Egyptian myth, the sun god Ra became angry with the people of Egypt when they stopped following his laws. He calmly and logically weighed up his options and decided that in order to lovingly guide his people back to the ways of justice and order, a good old fashioned genocidal purging was needed. He sent his daughter Sekhmet to earth in the form of a lion. There, she ravaged the land and the people until Egypt ran crimson with blood.
At this point, Ra had a slightly-too-late change of heart, and took pity on the blood soaked earth. Perhaps he realised that he was in danger of ceasing to exist if all his followers were eaten? (Ooh, philosophy!) He called Sekhmet off, but she was so full of vengeance and bloodlust that she ignored his orders. Rather than send down another lion to devour the first lion he’d sent to devour the people (like some sort of divine, fly swallowing old lady), he decided to change tact. He poured a thousand jugs of pomegranate stained beer into the Nile, which turned the water red. Sekhmet, believing it to be blood, drank it all and became immediately so shitfaced that she passed out for several days straight. When she woke up, the hangover was presumably so intense that her desire for maiming and destroying had waned, and humanity was saved.
A thousand jugs, eh?
I was not about to make a thousand jugs of humanity-saving beer. Having heard horror stories of home brews gone wrong I was pretty sure that if anything my beer would end up threatening humanity’s existence. More specifically, one human’s existence. Mine.
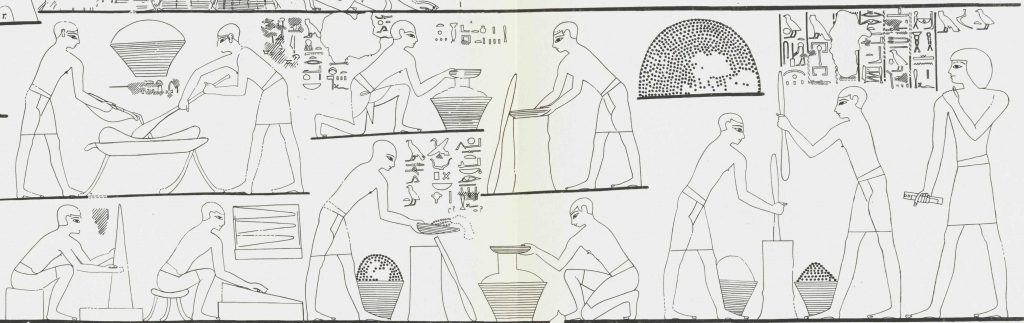
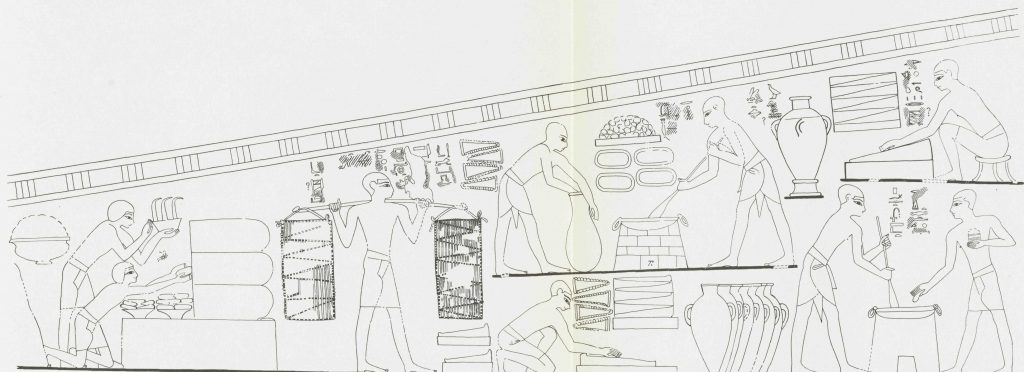
The starting point for Marks, Charles and Boyle’s creation came from engravings on a clay tablet dating to c. 1800 B.C. This tablet was a hymn to Ninkasi – the Sumerian goddess of beer – who apparently brewed a fresh batch every day as part of her holy rituals. The tablet helpfully details the brewing process, and it was this process which acted as guidelines for the experiments. It’s worth noting here that though the inspiration is Sumerian, the technique (and most of the ingredients) are Egyptian, hence the title ‘ancient Egyptian beer’.
The hymn makes reference to ‘beer bread’ as a starting point in the brewing process. This was a common technique in Mesopotamia whereby leavened loaves were partially baked and then crumbled over pots. Water was poured over the crumbs and the whole mixture was left to ferment for a couple of days before being drunk as beer.
The Egyptians of the Old Kingdom followed this method too but by time of the New Kingdom a new method had emerged. Instead of making little loaves to start with, they made two mashes – a hot one and a cold one. Analysis on pots of ancient beer have shown that the cold mash was made with malted grains and the hot one with either malted or unmalted – the results were unclear. This is a good time to also point out that there were no hops used in the beer brewing process as hops weren’t used until around the 9th century.
The mashes were mixed together, strained, and left to ferment out in the open for a day or two. That was it – end of process. Despite the fact I tend to zone out after two minutes when anyone talks to me about beer, I’d managed to learn enough to know that the Egyptian way seemed suspiciously simple. Where was the carefully controlled heating? The sterilising and meticulous monitoring to prevent unwanted cross-contamination in the yeast? And, bloody hell, had anyone even thought about designing a quirky and original label for the bottle yet?!
The process begins…
First things first I had to get hold of some malted grains. My choice of grain was the only area I deviated from the British Museum’s version. I had a bag of einkorn grains in the cupboard (no, really, I did. My husband uses it as evidence every time he tries to show me that this blog has got out of control.) Einkorn was grown in Mesopotamia from as far back as 10,000 years ago and though there is some disagreement online about whether it was commonly used in Egypt, I decided to work with it because a) it was a fitting tribute to the origins of this experiment and b) when else was I going to use a bag of einkorn grain otherwise?
To start the malting process I placed the grains in a jug of water and left them to soak overnight. The next day I drained the water and spread the grains out in a tray. I sprinkled on a little more water so they were wet but not submerged, covered them with a cloth so that air could get to them but insects couldn’t, and left them on the windowsill for three days. After this time they had grown little tendrils, a bit like eyes on potatoes. After I baked them low and slow for a couple of hours they were ready to be ground.

Despite my husband’s belief that my hobby has taken over our lives, I am yet to own a quernstone – it’s on my Christmas list. Because of this, I had to grind the grains little by little in a mortar and pestle. Let me tell you, for those of you who have never done this, it was Not Fun. It took well over half an hour to pulverise even just 100g of grain and at the end of it my FitBit told me I’d done 13 minutes of active cardio – a personal best if ever I saw one.

For the unmalted mash I decided to do something different and used barley; a common and popular grain of ancient Egypt. I ground another 100g of this, sweating and swearing like I imagine all Egyptian brewers must have done (or perhaps not if they had the right tools – hint hint, J.)
The malted einkorn was then added to room temperature water while the barley was added to water that had recently boiled but was warm rather than hot. The barley was then heated further until it thickened to a porridge like consistency and smelled, well, porridgy and delicious. I mixed both mashes together in a large pan and left the lot to cool completely.
Homebase: the place for all your DIY, garden and ancient cookery needs
The Egyptians brewed their beer in ceramic vessels that looked like tall flowerpots. I didn’t need much more of an excuse, so popped off to Homebase to purchase a terracotta pot. The trouble was that all the pots had holes in the bottom of them to allow water to drain out of. As I explained to the bemused shop assistant, this simply wouldn’t do. Were there any plugs I could buy to stop the hole up? He offered me some sort of plastic tray and backed away slowly, but it didn’t really do the trick.
I was then struck with inspiration, perhaps sent from Ninkasi herself. I could stop up the hole by using a barley flour dough, mixed to the consistency of putty. It wouldn’t be adding anything that wasn’t already in the mixture, and should fill the gap nicely. For the first time ever, an improvised idea of mine worked! The hole suitably plugged and tested with water, I lay a circle of baking paper over the base as an extra precaution, and poured my two now-cool mashes through a sieve into the pot.
Following the method of Marks, Charles and Boyle, I added a date to speed up fermentation, and an aromatic spice mix of crushed roasted pistachios, rose petals, cumin, coriander and sesame seeds. I covered the pot with a thin cheesecloth and left it to fester – sorry, ferment – for a couple of days.

Straight out of Tutankhamun’s tomb. 
Just in case you don’t know what pistachios look like.
Waste not want not
In the meantime I pondered what to do with my leftover grains sitting in the sieve and thought back to the beer bread. Despite having no proof I felt sure the ancient Egyptians – or any ancient civilisation used to facing droughts, famines or just slightly poor harvests – would have thought twice about throwing food away if it could be transformed into anything even vaguely edible.
I blitzed some dates to a pulp (in a blender, thanks. I wasn’t about to do anything by hand again), and combined the paste with the leftover grain dough. To this I sprinkled in a spoon of the spice mix and patted the mixture into four round discs, which were baked in a low oven for about an hour. They tasted decent enough – a bit molasses-y and nutty, with a powerful spicy punch from the coriander and cumin. I think they’d work well with a sharp cheese, although I ate one on its own without any fuss.
After two days I couldn’t put the terracotta pot sitting on my kitchen counter out of my thoughts any longer. The Egyptians drank their beer straight out of the pots with long straws but I hadn’t made enough to come up to a level that a straw could reach, so I ended up having to pour it into a glass and then wait for it to settle a bit. I somehow ended up with more sediment than drinkable liquid, but there was definitely something there.
The verdict
It smelled unpleasant. Kind of sour, kind of cheesy; not like something I’d normally want anywhere near my mouth. However, I was confident that I’d followed all the instructions and there was no visible mould at least, so I took a gulp.

My first mouthful contained too much sediment – a gritty texture with a slight bread-dipped-in-vinegar flavour. I felt my salivary glands go into overtime to combat the sourness of it. Bugger, I thought, it’s gone bad. All that effort for no reward. I’d already eaten a chocolate bar to combat my 13 minutes of active cardio, so I really did have nothing to show for all my work at this point.
Once the sediment had died down a bit more I took a sip of the clearer liquid on top. This was a lot more palatable. It was lighter and thinner than the thick lumpy mixture at the bottom, for a start. It tasted sour, yes, but in a sharp way – a bit like a cheap white wine. The spices weren’t a prominent flavour, but I did pick up a hint of cumin. Whether that was my imagination playing tricks on me or the effects of overzealous seasoning is anyone’s guess, but it wasn’t unpleasant either way. Helen Strudwick explains “the quality of beer depended on both the skill of the brewer and the sugar content…” and while I wouldn’t say my skill was amazing, I didn’t use any added sugar (other than one measly date) and it turned out alright.
I have no idea what the alcohol content was, but research suggests the average Egyptian beer had a 3% – 4% alcohol content. Beer for workers was probably around 2% – the last thing a pharaoh wanted was wonky noses on all his sphinxes because his workers were too pissed to see straight. The content and quality was higher depending on who the beer was for (pharaohs got highest) and how the beer would be used (religious ceremonies got high quality beer, workers taking payment in beer got lower quality.)

At the end of all this my opinions on beer haven’t really changed. I’d still pick a sugary sweet cocktail over a pint, and I haven’t developed a passion for home brewing (much to my husband’s relief.) Yet it wasn’t as bad as I’d expected. It smelled awful, true, but it was light and drinkable and definitely alcoholic – which is about the limits of my appreciation for beer anyway. All in all, not bad.
E x
Ancient Egyptian(ish) Beer
200g sprouted grain (wheat, barley, einkorn, emmer – any will do)
200g unsprouted grain
1l water
1 date
Handful of pistachios
1/2 teaspoon coriander seeds
1/2 teaspoon cumin seeds
1/2 teaspoon sesame seeds
1 teaspoon rose petals
- Grind your sprouted grain to a coarse flour. Add about 500ml of room temperature water to the grain and stir well.
- Grind your unsprouted grain. Add 500ml of recently boiled water to the grain and stir. The water should be warm to touch, but not boiling.
- Heat the unsprouted grain and hot water mixture until it thickens to a porridge like consistency.
- Pour both mashes into a large pot and allow to cool completely.
- When the mashes have cooled together, place a sieve over a ceramic pot. Pour the mashes into the sieve and allow the liquid to drip into the ceramic pot.
- Toast and crush the spices and place them in a muslin bag or cloth. Place the spice bag in the pot with the liquid. Add the date to the pot.
- Cover the pot with a cheesecloth or similar and leave it at room temperature for no more than a couple of days.


You must be logged in to post a comment.